
Creamy and delicious — these green dessert bars taste just like mint chip ice cream and they’re the perfect treat for St. Patty’s Day festivities. They also contain a secret ingredient that you wouldn’t suspect!
I’ve been making this yummy treat for years, and every year I plan to add it to the blog for St. Patrick’s Day, but something keeps coming up and I never seem to have the time to get the recipe ready to post. I know last year I was busy with school.
I was busy with school but not for long. March 16th was our last day on campus before everything was shut down due to covid. I had a fridge full of these at the time, which I was planning on bringing the next day to share with my classmates. Instead, on the 17th, I was cleaning out my studio and bringing these treats home to share with the family.

I always thought it was weird the whole country celebrates Saint Patrick’s Day. My mom would always make corned beef and cabbage (and to this day I make a vegan version of the same dish), and I remember my grandmother making a beautiful green cake decorated with shamrocks. To my knowledge, it’s a Catholic holiday and not really about being Irish, but I’m not going to give up an excuse to be spirited and festive. Especially if that includes a pint of Guiness (my apologies to those of you with gluten allergies), tempeh corned “beef,” and a delicious dessert!
The recipe for these is very similar to my vegan cheesecakes (which I’m sure you know I make a lot of!), I just don’t add the tartness to give them that “cheesiness.” These are simply smooth, minty, and sweet. Oh, and that secret ingredient I was telling you about, spinach! A large handful of it at that! Definitely doesn’t give the dessert a spinach flavor, but what it does give is that beautiful green coloring. Not to mention some extra health benefits. Perhaps I should have called these Pop-Eye Bars, LOL!
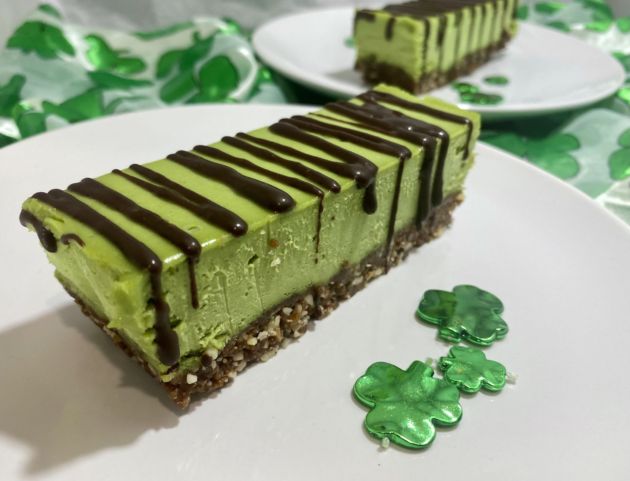
Last night, I enjoyed one of these Creamy Mint Bars for my after dinner sweet tooth. It’d been a whole year since I’d had one (slightly less since St. Patrick’s Day is next week), and I wondered why in the world do I think I need to wait an entire year before making them again?! If you like mint and you like chocolate, there’s no bad time of the year or these.

OK, delicious year round, but perfect for the coming holiday. You can also check out my Irish Liqueur-Chocolate Vegan Mousse made with Baileys Almande and rich chocolate, also perfect for St. Patrick’s! If you try either one, take a pic and tag me on Instagram to show me your spirited sweet treats! Also, leave a comment below telling me about your experience making these bars. Happy St. Patty’s!

Creamy Mint Bars
Equipment
- Food Processor
- High-Speed Blender (*recommended)
- Double Boiler (or a *sauce pan topped with a skillet)
- 9” x 5” loaf pan, lined with parchment paper (or use a *muffin tin fitted with paper cupcake liners)
Ingredients
For the crust…
- 1 cup raw almonds or more as needed
- 1 cup pitted dates or more as needed (if dates are hard from being refrigerated, let soak in hot water for 15 minutes, then drain)
- 1 Tbsp unsweetened cacao powder or sub unsweetened cocoa powder
- pinch sea salt
For the filling…
- 1 can unsweetened coconut milk (full fat, NOT lite!) refrigerated for at least 24 hours (you will be removing and using a 1/2 cup of the coconut cream from the can)
- 1 1/2 cup raw cashews soaked overnight
- 1/4 cup + 2 Tbsp coconut oil
- 1/4 cup + 2 Tbsp blue agave syrup
- 3 Tbsp fresh mint leaves
- 1/2 Tbsp pure vanilla extract
- 1/2 tsp organic peppermint extract
- 1 pinch sea salt (or more if needed)
- 1 large handful fresh baby spinach for coloring (don’t worry, you can’t taste it!)
For the chocolate topping…
- 1/4 cup non-dairy chocolate chips soy-free if necessary
- 1 Tbsp non-dairy milk
- 3/4 tsp pure maple syrup or more to taste
Instructions
- Add all of the crust ingredients to your food processor fitted with an s-blade. Mix on high until the a dough can be formed when the mixture is pressed between two fingers. If the mixture is too dry to hold shape, add more dates. If the mixture is too moist, add more almonds.
- Line a 9” x 5” loaf pan with parchment paper. If any parts of the pan are not covered with parchment, spray or rub with oil. Add the “dough” to the bottom of the pan and press down firmly to form a crust. Try to distribute the mixture as evenly as possible. Once a crust is formed, add the loaf pan to your freezer.
- Open the can of refrigerated coconut milk. Scoop out a half of a cup of the coconut cream (the solid part), which should be separated from the coconut water. Add the half cup of coconut cream to your high-speed blender, followed by all of the remaining filling ingredients.
- Start the blender at low and gradually build up to the highest speed. Blend until the mixture is completely smooth, stopping to scrape the sides as needed. Taste and if the flavor is a little flat, add an additional pinch of sea salt.
- Remove the loaf pan from the freezer. Pour the filling into the loaf pan over the almond crust. To create an even surface, you can gently rock the pan back and forth until the mixture is even, or use a silicon spatula and glide it across the top of the filling. Add the loaf pan to your freezer and freeze overnight.
- The next day, remove the loaf pan from your freezer and let it sit at room temperature anywhere from 30 to 60 minutes. You want it defrosted enough to where it will easily pull out of the loaf pan, but still partially frozen in the middle. When it seems ready to pull out, glide a dinner knife along parts of the loaf pan not covered by the parchment (if there are any), then lift up at the sides of the parchment to remove the dessert from the pan. Transfer to a cutting board.
- Using a sharp knife, cup the dessert into 6 bars, wiping the knife with a wet cloth in between cuts.
- Boil water in the bottom of your double boiler (or sauce pan). Once boiling, turn off the heat and add all of the topping ingredients to the top pot (or to the skillet, if using). Whisk constantly until the ingredients are completely combined and smooth.
- Drizzle the chocolate topping over the 6 Creamy Mint Bars. You can do this using a small spoon, or first transfer the chocolate topping into a squeeze bottle. Either method works. If desired, rather than squiggles, you can draw shamrocks or other fun pictures with the chocolate drizzle.
- Transfer the Creamy Mint Bars into your refrigerator until completely defrosted (1 to 2 hours), then they are ready to enjoy. Store leftovers in the refrigerator for up to 5 days.